When you first open the Estimate Tab:
- You will see the splash page, it presents the major regions of a vehicle.
- You can select either the tiles on the right or click directly on the vehicle regions on the left.

The Partly Diagram Breakdown
- After selecting a vehicle region you'll be taken to the Diagram Breakdown page for that specific vehicle region.
- Here you can see all of the relevant diagrams. You can scroll down to see all diagrams, simply click on the one you want to proceed with.
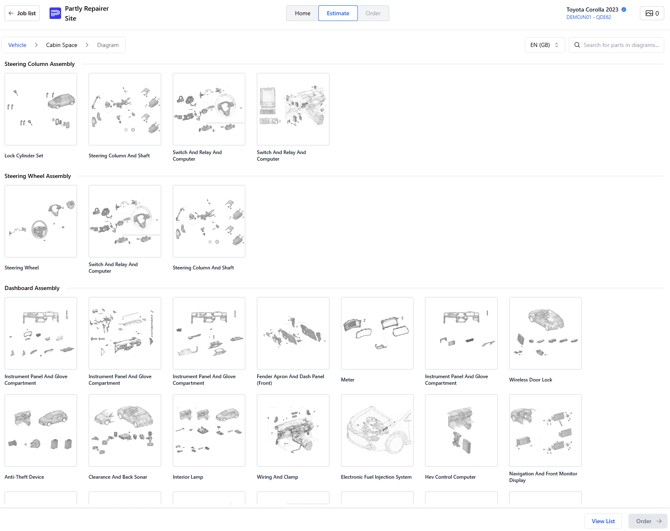
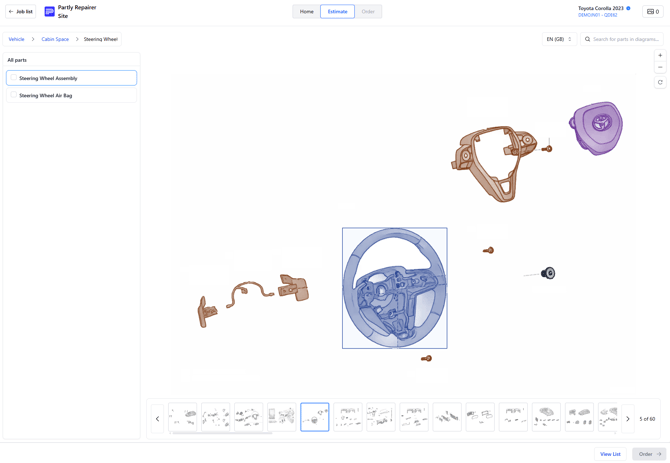
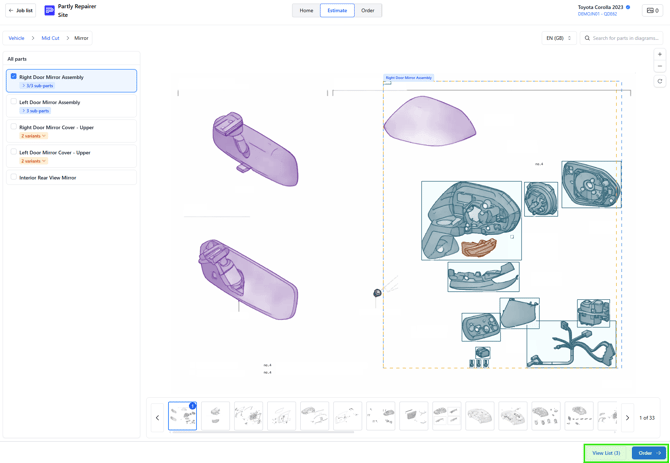
Diagram Part Selection
- After selecting a diagram you'll see a Partly Parts Selection Diagram, you can click on any part in the diagram and it will be highlighted in the parts list column on the left.
- You can also select parts in the left hand column directly and they will be highlighted in a spotlight box.
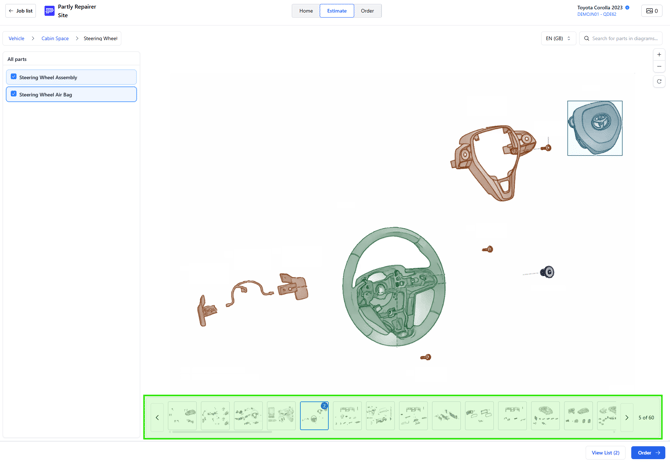
- Click the selection dot on the left of the part name to add it to your selections.
- Note: Some vehicle diagrams are currently non-interactive. For those vehicles you can only select parts from the column on the left.
- You can tell when a diagram is non-interactive because it will be black and white.
For these non-interactive diagrams, please add the part directly to your parts list. You can find the instructions on how to do this below in the "Parts List" section.
Navigating to the Next Diagram
- Once you've selected all the parts you need on a given diagram you can navigate to the next diagram using the carousel at the bottom of the window.
- This carousel has a horizontal scroll bar, so you can browse through all of the diagrams for your selected car region here if you like.
Returning To The Higher Assemblies
- Once you're done in a given area of the vehicle you can navigate back up to the splash page using the breakdown in the upper left hand corner.
- In the example below "Cabin Space" would take you back to the cabin space diagram menu we saw earlier.
- "Vehicle" returns you to the vehicle breakdown splash page from the start of the article.
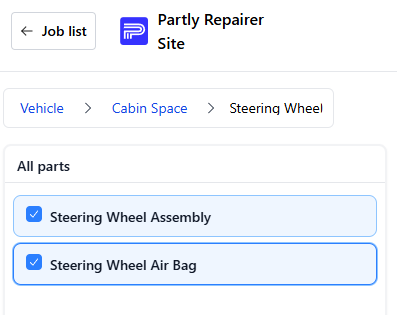
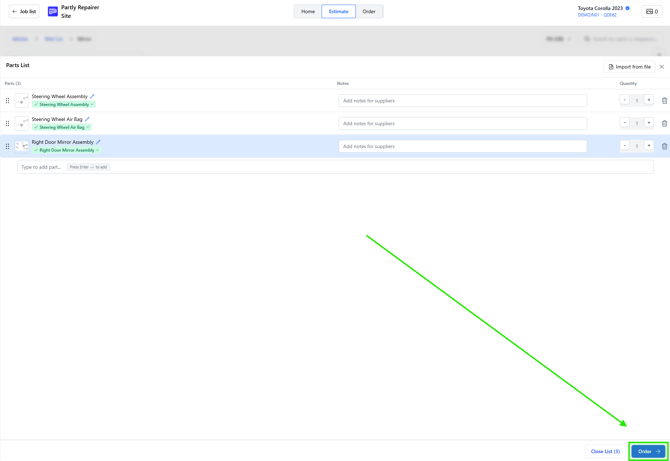
Viewing Your Parts List.
- Now that you have selected all of the required parts it is time to review the list to make sure nothing was left out.
- To do that, select the "View List (#)" button in the bottom left hand corner.
- Or you could click "Order" and move directly to the Order Tab if you're already confident in your selection.
- The parts list is where you check over your parts list and add any necessary notes for your suppliers.
- There is also a part addition bar just below your chosen parts, here you can enter any part, even if it isn't in the Partly Catalogue to send to your supplier.

- When you are confident in your parts list and have added the necessary notes click the 'Order' button to move onto the next tab.
Congratulations you've now mastered the Partly estimation process.
- If you're still feeling unsure about something, or feel that this article could use some improvement. Please do reach out to us at the helpdesk.
- Email: helpdesk@partly.com