.svg)
What Shipping settings do
Every part you sell has a size tier. Shipping settings turn those tiers into a price: you tell Partly what each tier costs to send, who pays which price, and when parts travelling together should stop being charged separately.
Once configured, Partly calculates a shipping price automatically on every order and offer, so your team quotes the same number every time instead of guessing.

Open Shipping settings
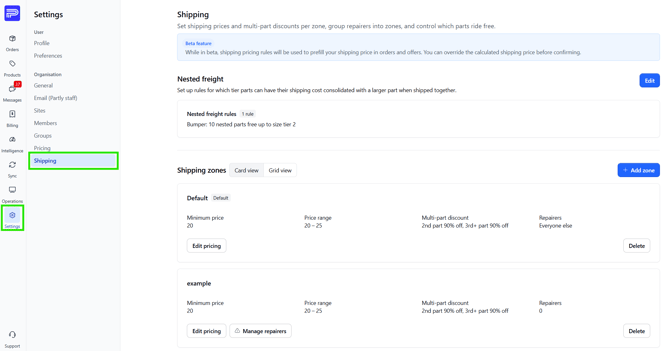
Select Settings in the left navigation bar, then Shipping under the Organisation heading.
The page has two parts: Nested freight at the top, and Shipping zones below it.
The four building blocks
Everything on this page is built from four ideas. Learn these and the rest of the screens explain themselves.

Size tiers reference
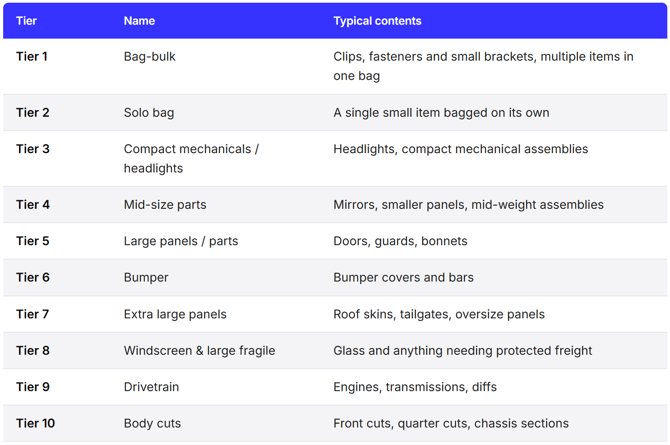
The same ten tiers appear in nested freight rules, zone pricing, and grid view. Tier 1 is the smallest.
Set up nested freight
Nested freight stops you charging twice for parts that travel inside a larger one. A rule names a carrier tier, the largest tier that rides free with it, and how many parts can ride.
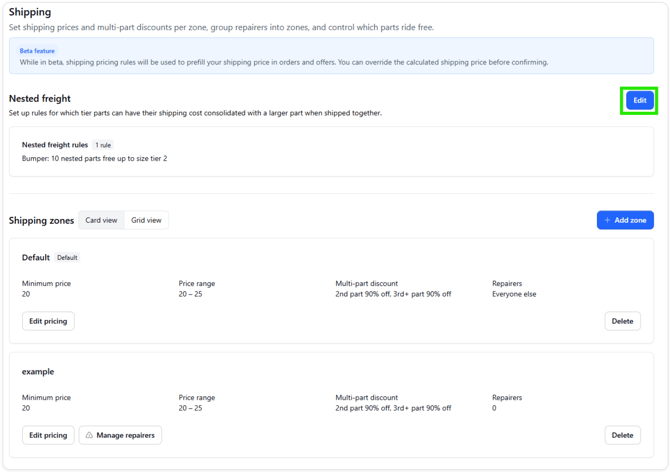
1. Open the rule editor
Select Edit beside Nested freight. The card underneath summarises the rules you already have, with the rule count shown next to the heading inside the card. One rule might read Bumper: 10 nested parts free up to size tier 2.
2. Read the rule
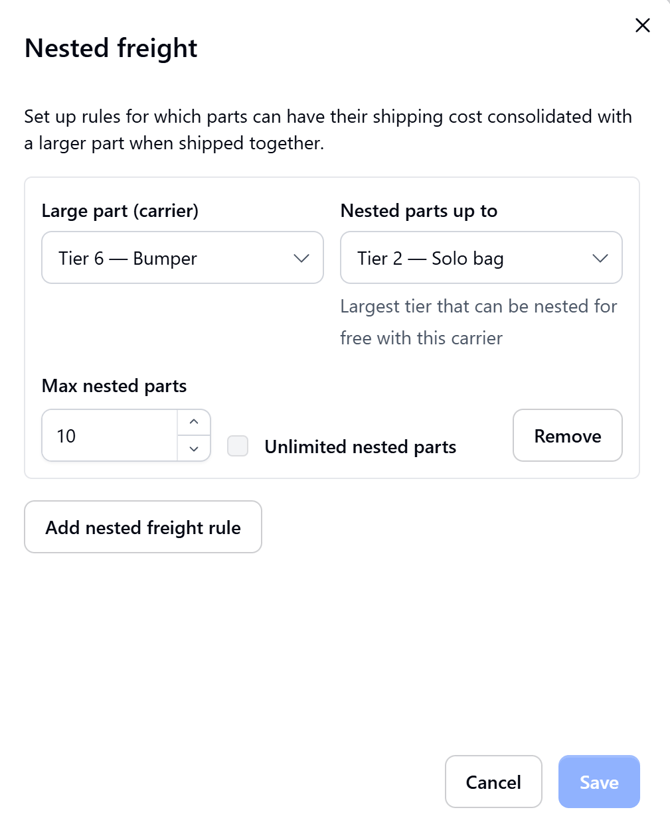
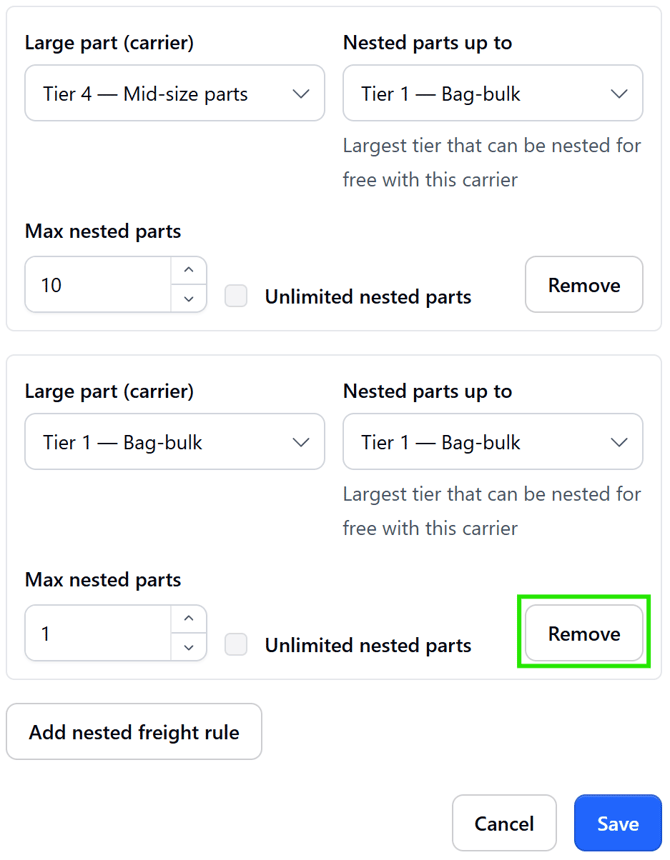
Each rule is one block with three controls, and reads as a sentence: a Tier 6 bumper carries up to 10 parts of Tier 2 or smaller, free. Use Add nested freight rule for another block, or Remove to delete this one.
3. Pick the carrier part
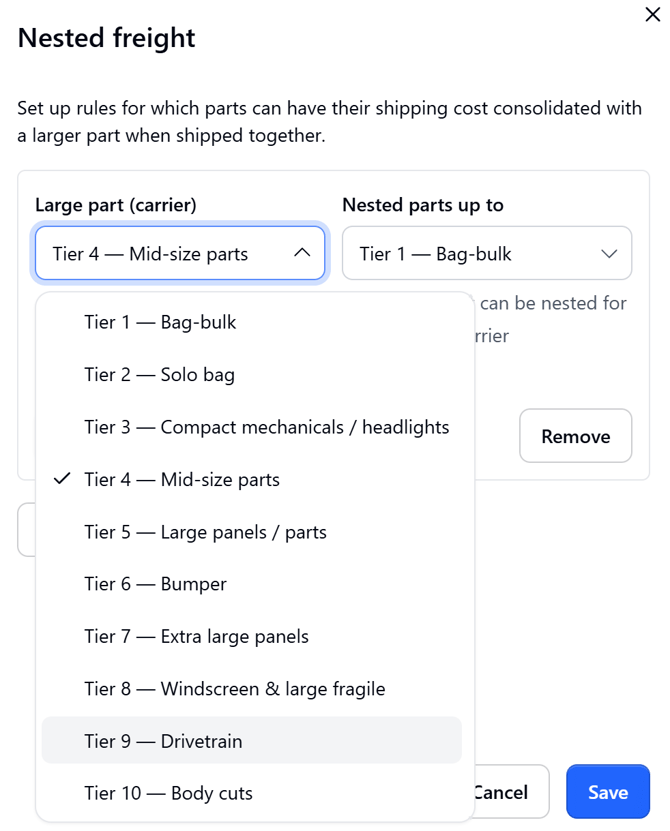
Under Large part (carrier), choose the tier that does the carrying. All ten tiers are available and a tick marks the current selection. Pick the tier of the part that actually determines the freight cost, usually a bumper, panel, or drivetrain item.
4. Set what rides free
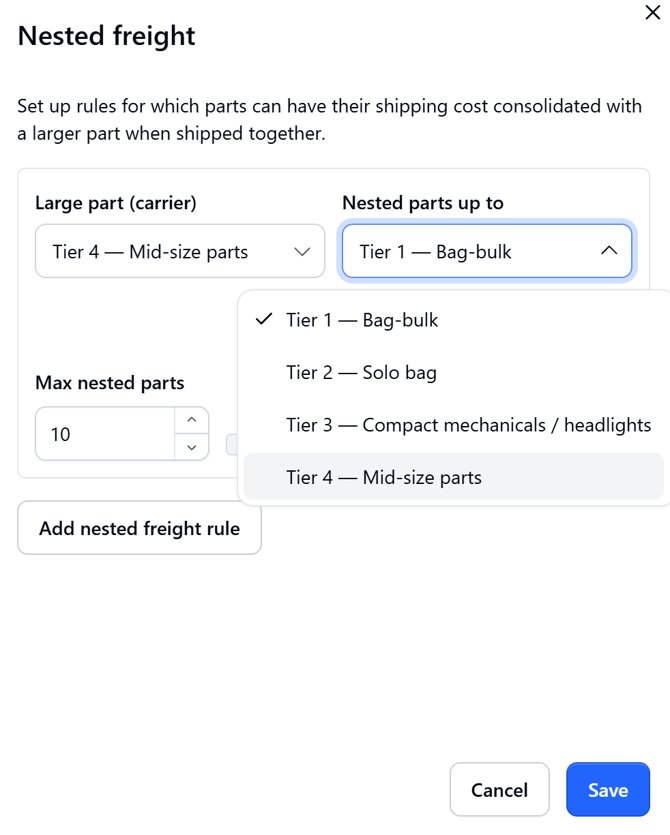
Under Nested parts up to, choose the largest tier that can be nested for free with this carrier. The list only offers tiers up to the carrier itself, so a rule can never make a part carry something bigger than itself. With a Tier 4 carrier, only Tiers 1 to 4 are selectable.
5. Cap the quantity
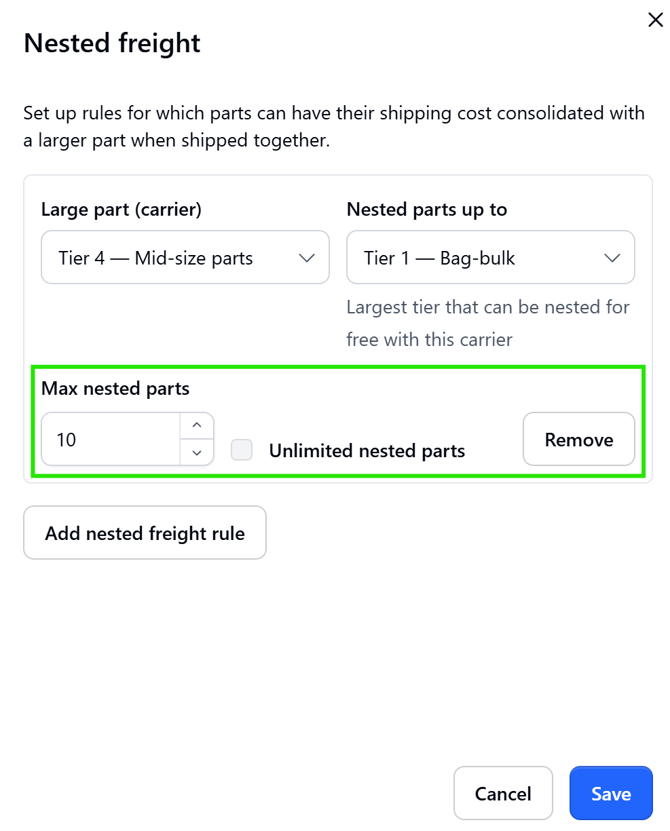
Enter a number in Max nested parts, or tick Unlimited nested parts to remove the cap, which disables the number field. Set a real number if you want a limit that reflects what fits in the box; unlimited means a single carrier can absorb an entire order's small parts.
6. Add the rest of your rules, then save
Select Add nested freight rule for each additional carrier tier you want to cover. Rules stack down the dialog, and each block has its own Remove button that deletes only that block. Select Save when the set is complete, or Cancel to discard.

Create a shipping zone
A zone is a price list plus the repairers it applies to. You always have a Default zone, and it covers everyone you haven't placed elsewhere. Add more zones when a group of repairers should pay a different rate.
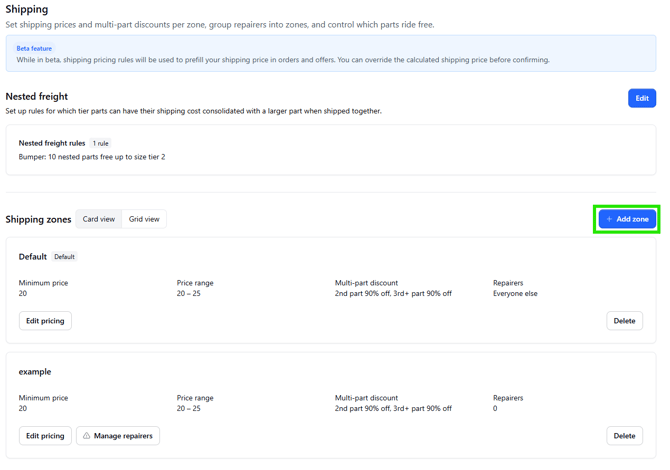
1. Select Add zone
The button sits at the top right of the Shipping zones section. In Card view, each existing zone appears as a card showing its minimum price, price range, multi-part discount, and repairer count.
2. Price each size tier
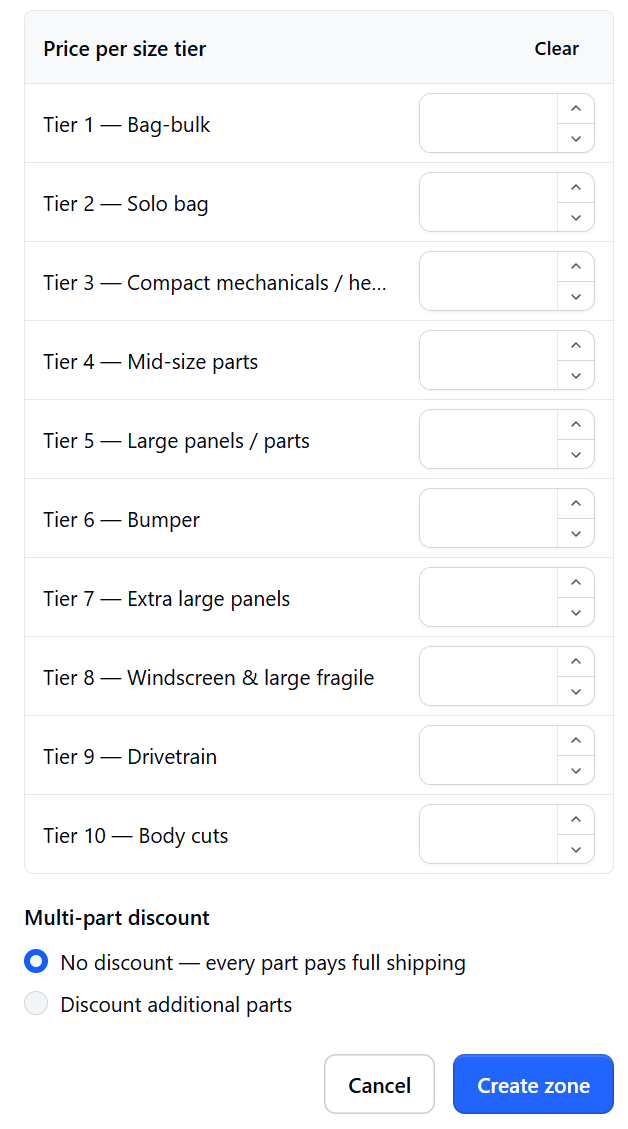
Name the zone, then enter a price for each of the ten tiers. Clear, at the top right of the price list, empties every field if you want to start again. You don't have to fill all ten immediately, but any tier left blank has no price to calculate from, so complete the tiers you actually ship. The multi-part discount options sit directly below the tier list, and Create zone saves the whole form.
3. Choose a multi-part discount
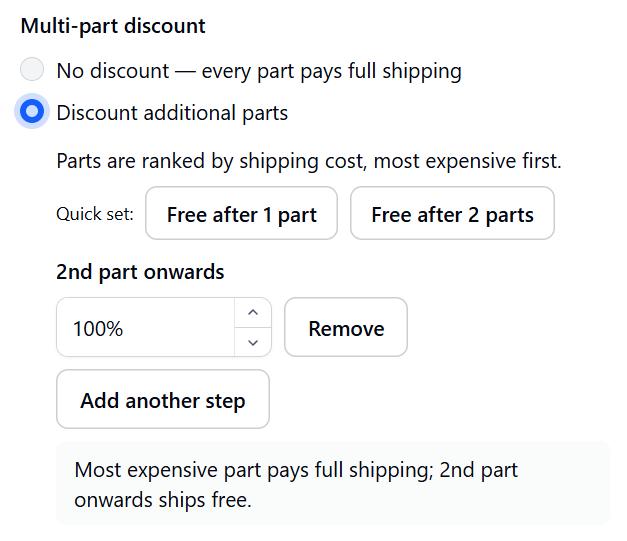
Pick No discount and every part pays full shipping. Pick Discount additional parts and Partly ranks the parts by shipping cost, most expensive first, then discounts from the second part onwards.
Use the Quick set buttons, Free after 1 part or Free after 2 parts, or build your own steps. Each step takes a percentage; Add another step lets you taper the discount (say 50% for the 2nd part, 100% from the 3rd). The grey summary line at the bottom always states the rule in plain English, such as most expensive part pays full shipping; 2nd part onwards ships free. Read it back before you save.
4. Select Create zone
The zone appears in the list straight away with no repairers attached. Assign them next.
Manage an existing zone
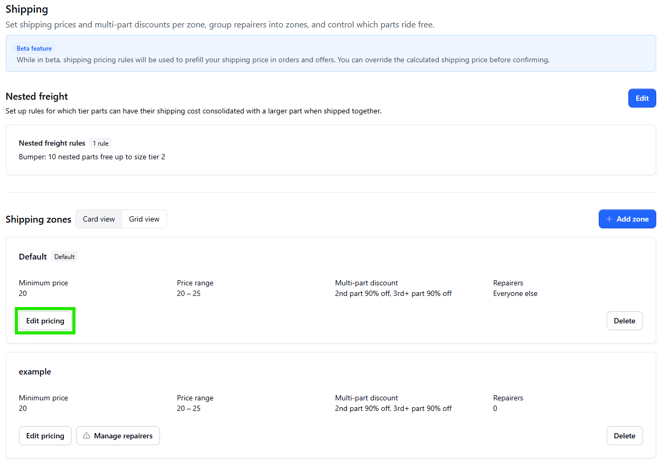
Edit pricing
Select Edit pricing on a zone card to reopen its tier prices and discount rules in the same form used when the zone was created. Every zone card carries this button, including Default.
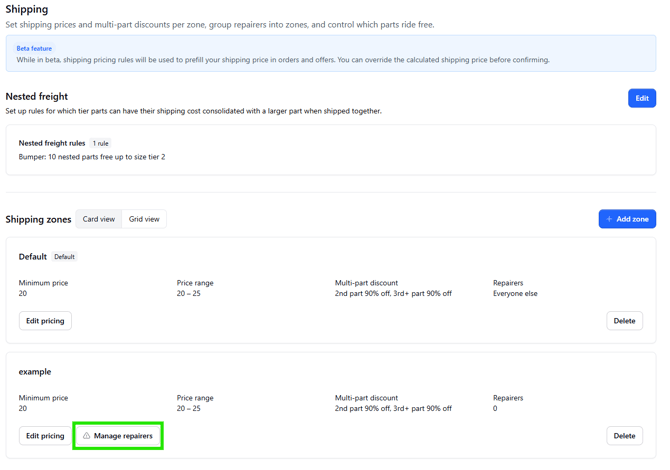
Assign repairers to a zone
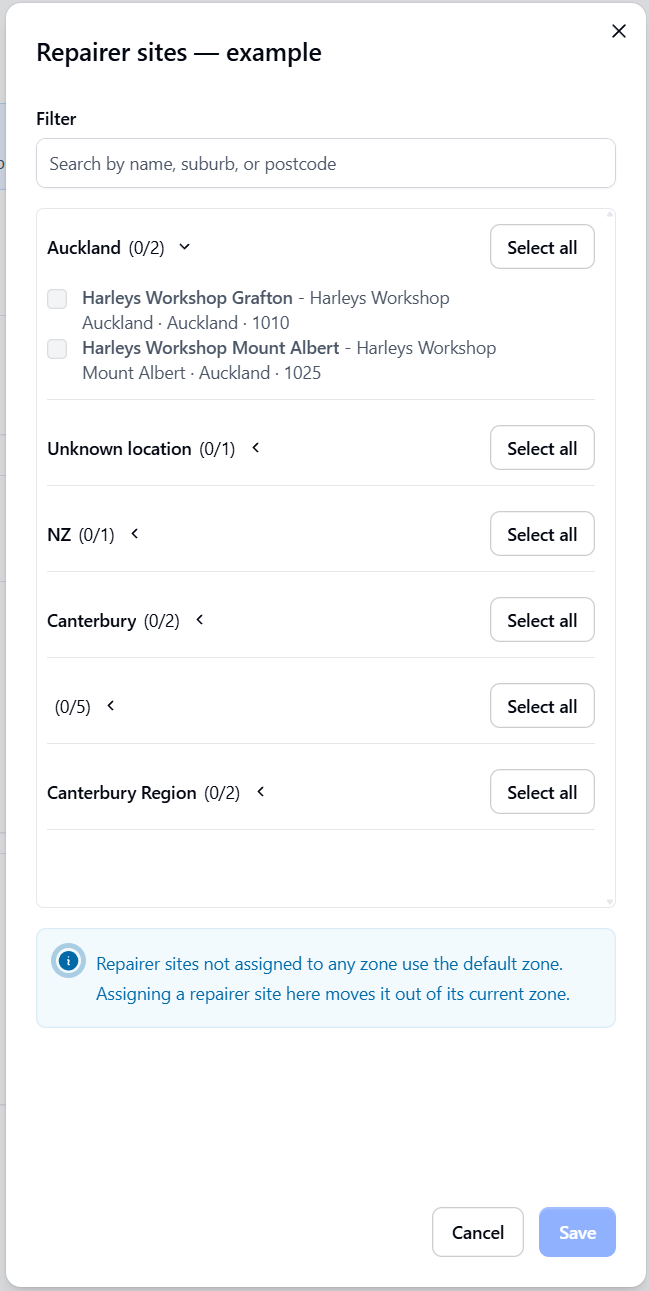
Select Manage repairers. A warning icon on this button means the zone has no repairers yet, so it will never be used until you assign some. The Default zone has no such button, because it automatically catches everyone else.
Repairer sites are grouped by location, with a count beside each group showing how many sites you've selected out of the total. Expand a group and tick sites individually, or use Select all to take the whole group. The Filter box searches by name, suburb, or postcode, which is quicker than scrolling once you have a long list. Select Save to apply.

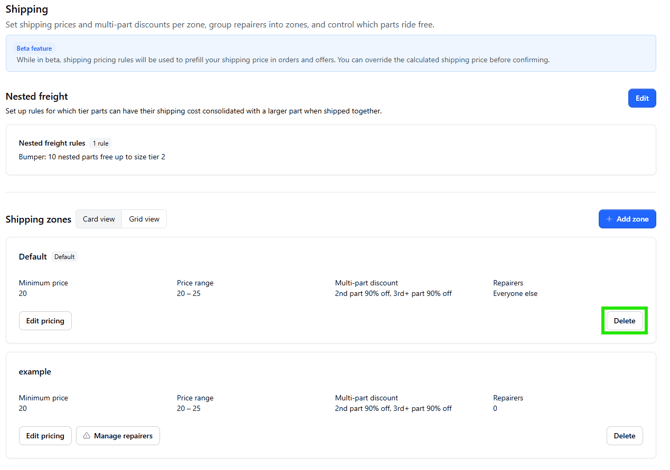
Delete a zone
Select Delete on the zone card. Any repairers assigned to that zone fall back to the Default zone and its prices, which changes what they are charged. Review the assignment list before removing it.
Grid view: price everything at once
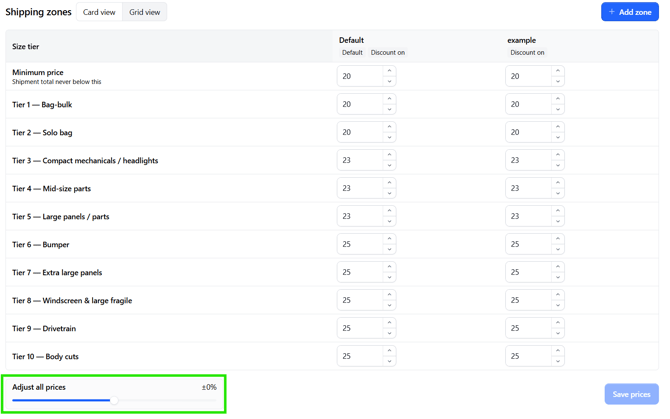
Switch from Card view to Grid view to see every zone side by side, one column each, with all ten tiers plus the minimum price as rows. Prices are editable directly in the grid, and badges under each zone name show its status, including whether a discount is on. This is the fastest way to spot a gap or an inconsistency between zones.
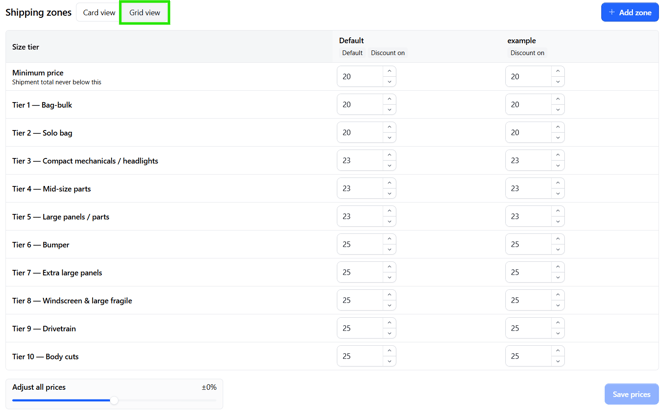
Minimum price
The first row sets the floor: the shipment total never drops below this figure, no matter how much the multi-part discount takes off. It protects you when an order is mostly free-riding parts.
Adjust all prices
The slider at the bottom shifts every price in every zone proportionally, which is useful for an annual freight increase. Set the percentage, check the numbers, then select Save prices. Nothing is applied until you save.